Posts

GCP-Tensorflow- Install Tensorflow-GPU with CUDA 8.0 and cuDNN 6

Hello everyone.. (This is the entire process. I will edit this post with images and format it properly later.) Today I'm gonna show you how to setup a Google Cloud Platform (GCP) GPU instance and install Tensorflow-GPU with CUDA 8.0 and CuDNN 6. (I'm not showing you how to register for GCP and get a Quota increase for having a GPU in a zone .. If you want me to show how that is done, comment below.) Let's begin... 1)  Open cloud.google.com and login to get to your console. 2) Navigate to Compute Engine -> VM Instances which appears by clicking on the Hamburger icon ( three  horizontal bars ) 3) Click Create 4) Choose all your requirements. I need 4 vCPUs and 15GB memory and a K80 GPU with 50GB storage having Ubuntu 16.04 Image. I will allow traffic from both HTTP and HTTPS. Observe carefully what I'm doing.. 6) The instance is being created. Meanwhile let's get links to download CUDA 8.0 and CuDNN 6. You need to have an account at NVIDIA's d...
Create your own Sendto Shortcut

Image
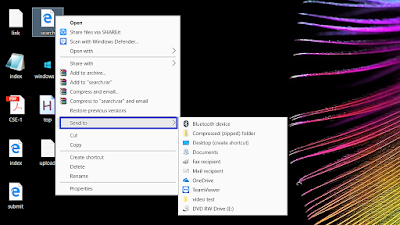
Hello everyone . . . As the name suggests, we are gonna make our own Sendto shortcut. For those of you who don't know a Sendto shortcut, don't worry. Its a thing which we use very often. For example Lets begin on creating on our specific location Sendto shortcut. Step 1 :- Choose the location and navigate there and copy the path of that location. I'm choosing a folder named "interesting" in my drive F. So, my path is F:\interesting\ Step 2 :- Navigate to the following path in your PC SYSTEM_DRIVE:\Users\USER_NAME\AppData\Roaming\Microsoft\Windows\Sendto\ In my case, SYSTEM_DRIVE is C and USER_NAME is Srikar. So I have to go to C:\Users\Srikar\AppData\Roaming\Microsoft\Windows\Sendto\ Note : Appdata is hidden by default , you have to make hidden files visible for seeing it. Step 3 :- Create a new shortcut by right clicking and select New -> Shortcut. It asks for location, Paste the location you have copied earlier and next it ...

Installation of PHP

Image
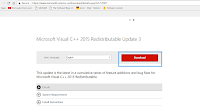
Hello Guys . . . Link Section Apache    :  https://www.apachelounge.com/download/ PHP         :  http://windows.php.net/download/ MySQL   :  https://dev.mysql.com/downloads/mysql/ VCRedist :  https://www.microsoft.com/en-us/download/details.aspx?id=53587 Note : Don't just see the name of things to be downloaded. Read it completely. Download Section 1) VCRedist 2015 Click the above link. If by any chance the link fails, Google it. It's boring to say the same thing again and again. Once you click the download button, you will be prompted to choose x-64 or x-86. 2) Apache Click the above link. If by any chance the link fails, Google it. Download the appropriate version based on your OS(64-bit or 32-bit). 3) PHP Click the above link. If by any chance the link fails, Google it. Download php5 which is suitable for your OS(64-bit or 32-bit) and Thread-Safe. Download the Zip pack of the correct version. ...

Auto Shutdown

Image
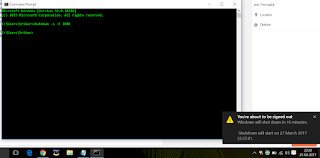
Hi guys . . . This is a short tutorial about setting automatic Shutdown without the need for any third party software/tool. Let's get into it. It can be done in two ways . . .  Method 1 Using CMD Open CMD and type the following code into it shutdown -s -t 1000 (The number 1000 is 1000 milliseconds. Change it depending on the amount of time you want the system to be on.) If you want to abort this automatic shutdown then type the following code into the prompt shutdown -a (This aborts the automatic shutdown which has been initiated from the previous command.) Method 2 Using a batch file Batch files are generally used to execute a set of commands on launching them. In order to create a batch file for automatic shutdown, open Notepad. Type the following code into it. shutdown -s -t 1000 (The number 1000 is 1000 seconds. Change it depending on the amount of time you want the system to be on.) If you want to abort...

MinGW Installation

Image
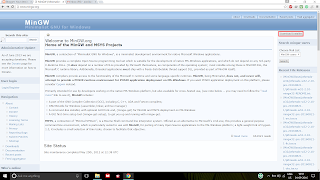
MinGW is a C/C++ compiler suite. MinGW(Minimalist GNU for Windows), formerly mingw32 is a free and open source software development environment for creating Microsoft Windows applications. ~ Wikipedia Step 1: Download   The link to download the installer is given under. Download it.(mingw-get-setup). MinGW Step 2: Installer Get the installer which will be downloaded when you run the mingw setup. Select the mingw basic and mingw gcc compiler After you are done with this... Click Installation on the top left and select update catalogue which will ask you review changes and accept them. When it finishes, your MinGW installation is complete except the part of "Path Setting" Step 2: Getting MinGW (alternate way) There is an other way to get the MinGW files. Click on the link given below and download the files. Paste them to your default installation disk (For example, my default drive is C). Then Proceed to the next step. Link :   http...

Installing Java

Image
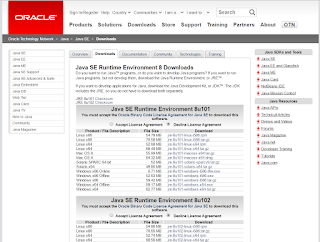
Downloading and Installing Java S tep 1 : Download the Java jdk(Java Development Kit) and jre(Java Runtime Environment) from the following links. Choose the appropriate version for your OS. Java Jdk Java Jre Step 2: Install both of them in your default installation drive. After completing the installation proceed to setting the path variables. Setting up path variables.(Windows) Step 1: Open the properties of "your computer". Click on Advanced system settings. Select Environment Variables. (or) Type "environment variables" in windows search (start button). Step 2: Make a new system variable with name "JAVA_HOME" and the variable value as "the installation path" as shown in the picture. Step 3: Edit the system variable named "Path" and add an entry with the path of your jre bin as shown in picture. Step 4: You are don...

Find your college

Hi guys... Most of us will be eager to know what college you would be getting.  Here are the answer to your curiosities... Share your marks, interests, doubts with us and know those answers in the comments section below... Feel free to share them.